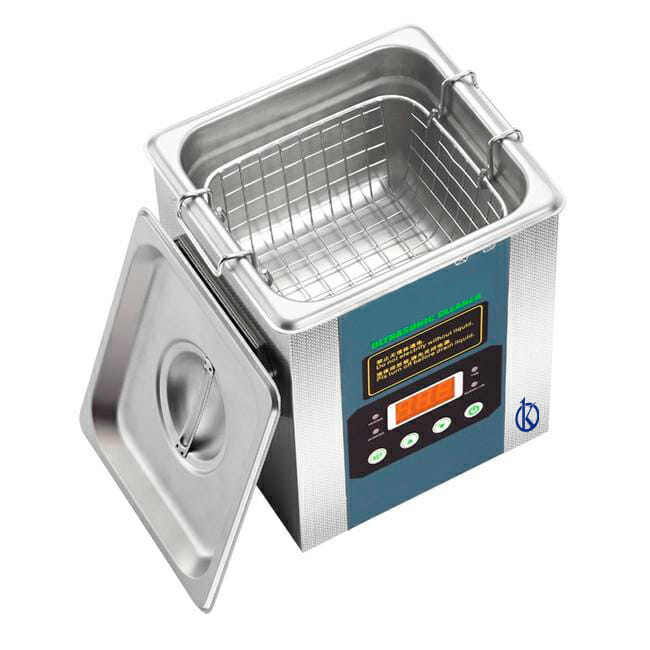
Ultrasonic cleaners are indispensable tools in the medical and laboratory fields, offering an effective solution for cleaning delicate and hard-to-reach instruments.
In this article, we present a detailed guide on how to use ultrasonic cleaners to achieve the best results. Join us as we share practical tips, step-by-step tutorials.
If you’re seeking a blend of innovation and quality, you’ve come to the right place. At https://kalstein.it/category-product/laboratory-line/ultrasonic-cleaner/ we offer you the luxury to explore our exclusive catalog of laboratory equipment. We manufacture each piece of equipment with a level of excellence. Our intuitive and agile online shopping channels are designed for your convenience, ensuring the friendliest prices. Don’t hesitate any longer, we bring science to life, it’s time to become part of our community. https://kalstein.it/
Introduction to Ultrasonic Cleaners
Ultrasonic cleaners have revolutionized the cleaning of medical and laboratory instruments due to their ability to efficiently remove contaminants. These devices use high-frequency sound waves to create microbubbles that collapse, generating energy capable of dislodging dirt and embedded residues from objects.
In addition to their efficiency, ultrasonic cleaners are ideal for cleaning delicate objects without causing damage. This method is particularly useful for precision instruments, laboratory glassware, and surgical tools, ensuring they are free of contaminants before use.
Preparing the Ultrasonic Cleaner
Before starting the cleaning process, it is crucial to properly prepare the ultrasonic cleaner. First, ensure the tank is clean and free of residues from previous cleanings. Fill the tank with an appropriate cleaning solution; it is recommended to use ultrasonic-specific solutions that do not generate foam.
Set the water temperature according to the manufacturer’s recommendations. Most ultrasonic cleaners operate optimally between 40 and 60 degrees Celsius. The correct temperature enhances the efficiency of cavitation, increasing the device’s cleaning capacity.
Choosing the Cleaning Solution
Choosing the right cleaning solution is essential for achieving the best results. Alkaline solutions are ideal for removing grease and oils, while acidic solutions work well for removing rust and mineral deposits. Ensure that the chosen solution is compatible with the materials of the instruments to be cleaned.
It is important to follow the manufacturer’s instructions regarding solution dilution. Using the appropriate concentration ensures the safety of the instruments and the effectiveness of the cleaning process.
Loading the Tank and Placing the Objects
Correctly placing objects in the ultrasonic cleaner tank is vital to ensure complete cleaning. Instruments should be fully submerged in the solution, avoiding direct contact between them to prevent damage from vibrations.
Use perforated baskets or trays to organize instruments within the tank. These baskets allow for an even distribution of ultrasonic waves, ensuring that all objects receive uniform cleaning.
Setting the Cleaning Cycle
The cleaning cycle setting depends on the type and degree of dirt on the instruments. Turn on the ultrasonic cleaner and set the cleaning time as needed. For lightly soiled instruments, a 5 to 10-minute cycle is usually sufficient. For more contaminated objects, a 20 to 30-minute cycle may be necessary.
Monitor the cleaning process and adjust the time if needed. Do not overload the tank or extend the cycles unnecessarily, as this could damage the instruments and reduce the device’s lifespan.
Rinsing and Drying the Instruments
Once the cleaning cycle is complete, remove the instruments from the tank and rinse them with distilled water to remove any residue of the cleaning solution. Rinsing is crucial to prevent corrosion and chemical buildup on the instruments.
After rinsing, carefully dry the instruments with a clean cloth or using compressed air. Ensure they are completely dry before storing or reusing them.
Maintenance of the Ultrasonic Cleaner
Regular maintenance of the ultrasonic cleaner is essential to ensure its optimal performance. After each use, empty and clean the tank to prevent the buildup of residues and corrosion. Check and replace the cleaning solution regularly as per the manufacturer’s recommendations.
Additionally, conduct periodic inspections of the device, paying attention to any signs of wear or damage. Keeping the cleaner in good condition prolongs its lifespan and ensures efficient cleaning of the instruments.
Practical Tips and Troubleshooting
To maximize the efficiency of your ultrasonic cleaner, here are some practical tips:
-
Do not overload the tank: Too many instruments at once can reduce the cleaning efficiency.
-
Use pre-washing: For extremely dirty instruments, consider manual pre-washing before using the ultrasonic cleaner.
-
Avoid foaming solutions: Solutions that generate foam can interfere with cavitation and reduce cleaning efficiency.
If you encounter problems such as insufficient cleaning or abnormal noises, refer to the user manual for troubleshooting. Ensure you follow all the manufacturer’s recommendations to keep your equipment in optimal condition.
Conclusion
Ultrasonic cleaners represent advanced technology in the cleaning of medical and laboratory instruments, ensuring precise and efficient results. By following this detailed guide, you can optimize the use of your ultrasonic cleaner, ensuring your instruments are always in the best condition. Adopting this technology not only improves hygiene and safety but also represents a significant advancement in the latest trends in medical technology and recent advancements in laboratory research.
Implement these steps and practical tips to maximize the benefits of your ultrasonic cleaner, ensuring effective cleaning and prolonging the lifespan of your valuable instruments.

